More gear reviews, more walls of text and few pictures. I’m sure you were looking forward to that ;). Let’s get started.
Sleeping system
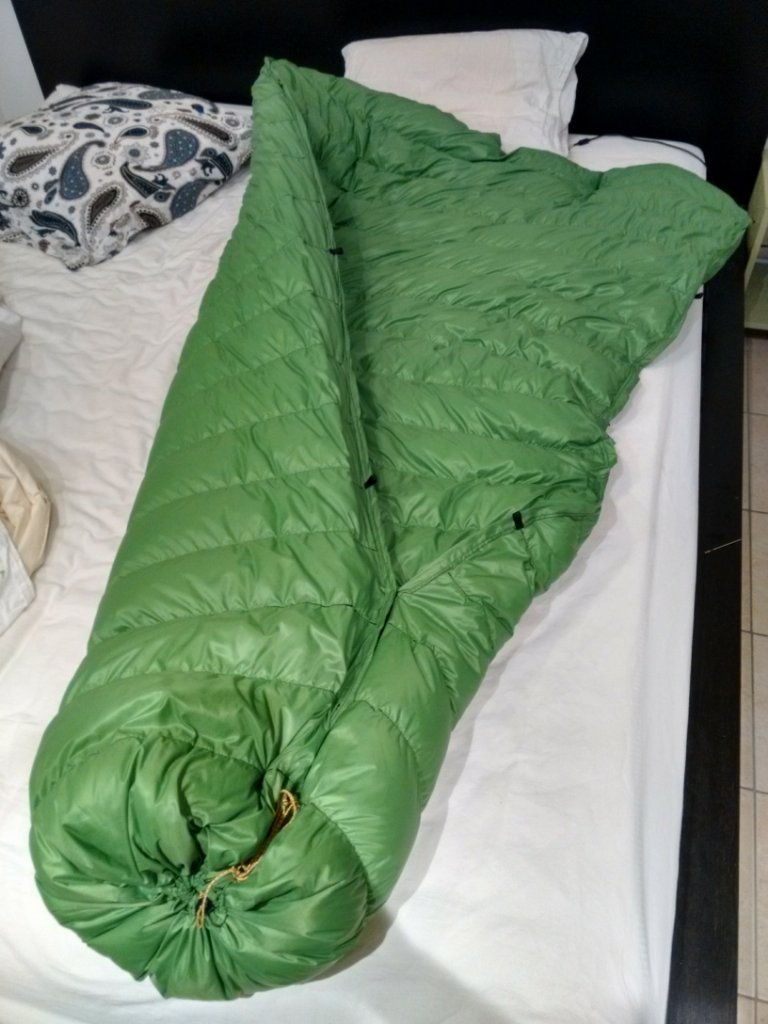
DIY -7 °C degree down quilt
In case you’re not aware, a quilt is basically a sleeping bag without the bottom. Thus, it only weights about half. Because lying on top of a sleeping bag’s bottom compresses the insulation, that more or less makes it useless for keeping you warm. And so a quilt is just as warm as a sleeping bag.
That’s the theory. It’s also true in practice ;). And it’s quite nice being able to just crawl out from under the quilt or toss it aside, it much less restricting than a sleeping bag. I love it!
The problem is that there don’t seem to be any European manufacturers of quilts. None of the big outdoors companies make them, no clue why. Anyway, that left me the option of either importing one from a small US manufacturer or making one myself. Importing would have cost about 500-600€ (thanks to a ton of taxes and shipping costs) and so I chose the DIY route.
The -7 °C rating seems to be the best option for a first quilt according to general consensus. You can always only put half of it on top of you if it’s too warm, the other way around is quite difficult.
I got the fabric and down from ExtremTextil.de. It’s a bit more expensive than some USA-based fabric stores, but shipping and import costs will kill the price advantage anyway. All together I spend about 175€ on this, way less than buying one. And I got to make it fit exactly and add all sorts of little tweaks.
For example, there’s 3 flaps of extra fabric, one on each side and one at the top, and they drape down and close off air gaps, which really makes the quilt much warmer. I found that trick on some DIY forum, but no clue where exactly.
And it only took me about 70 hours to make it ;). Good thing my time is for free. The final weight, with all the extra bells and whistles I put on is 615 gram. Good luck finding a sleeping bag with the same temperature rating at that weight.
If you don’t have a good sleeping bag yet, definitely look into quilts. As far as I’m concerned there’s only upsides to switching to one: lighter, just as warm and less restricting than a sleeping bag.
There’s a ton of small cottage industry companies that make top quality quilts for quite reasonable prices, e.g. Enlightened Equipment and ZPacks. But maybe have it sent to a USPS post office general delivery and pick it up there, so you save yourself a couple hundred euros in shipment and taxes.
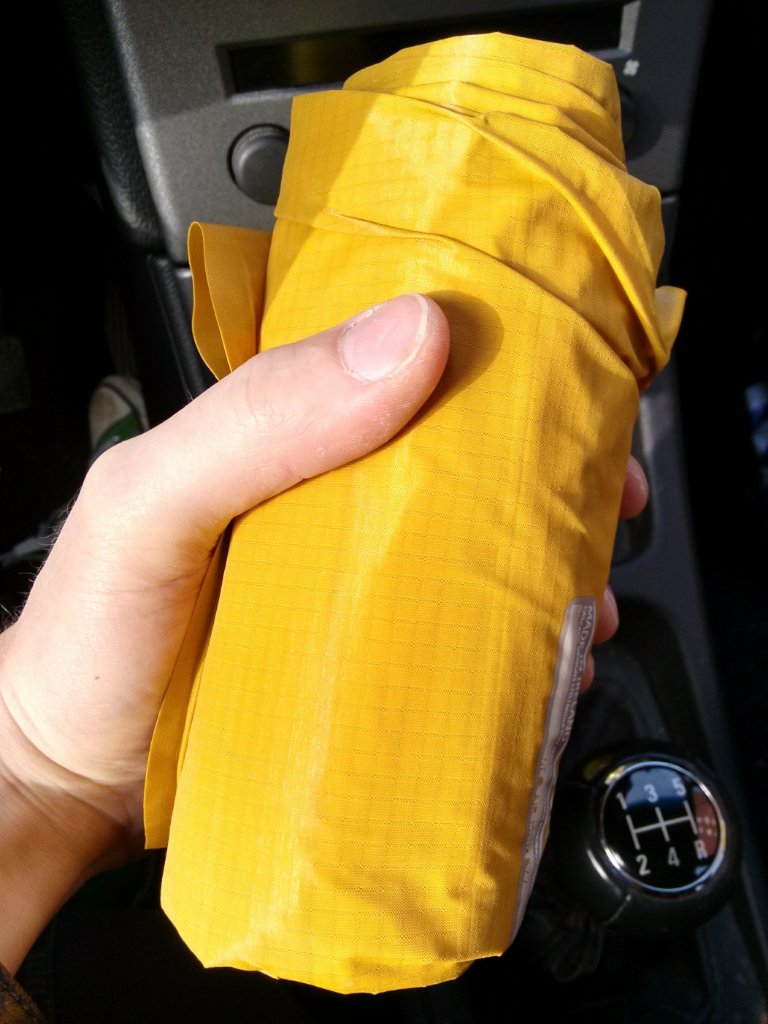
Thermarest NeoAir XLite small sleeping mattress
In order to save weight, I went the route of a 3/4th size pad, which goes from my head down to just below my butt. I believe it’s the lightest inflatable pad in the world, at 230 g. A full sized pad would have weighted twice as much, since I would have had to get the long version (>190 cm). Another advantage is that this one folds down to about the size of a fist, super small!
The idea is that you insulate your feet by putting your backpack underneath. Your knees just kind of lie on the ground or float in the air. And well, it works really well. I didn’t have cold feet (or legs/knees) any night on the trail.
It did take some getting used to to sleep on such a tiny mattress, but I got the hang of it after a few nights. One really nice trick, which Cat told me, is to lie on the pad and then deflate it until your hips sink down into it. Much more comfortable!
Don’t knock it until you try it. At first it seemed a crazy idea to try and sleep on such a short pad, but now I don’t see the point of bringing a bigger pad anymore.
Shelter
DIY Bivy
Wanting to go as light as possible, I opted for a bivy instead of a tent. A bivy is basically a big sleeping bag, but without the insulation and with a waterproof bottom. You put your sleeping pad, quilt and yourself inside and close it up again. Some commerial bivies are waterproof, mine isn’t since half of the top is no-see-um mesh for better breathability.
I should say that the bivy is not my design at all. In fact, I got the design from Lance Marshall over at the Backpacking Light forums, who gratiously provided it to me. All I did was lengthen it a bit, since I am quite a bit taller than him.
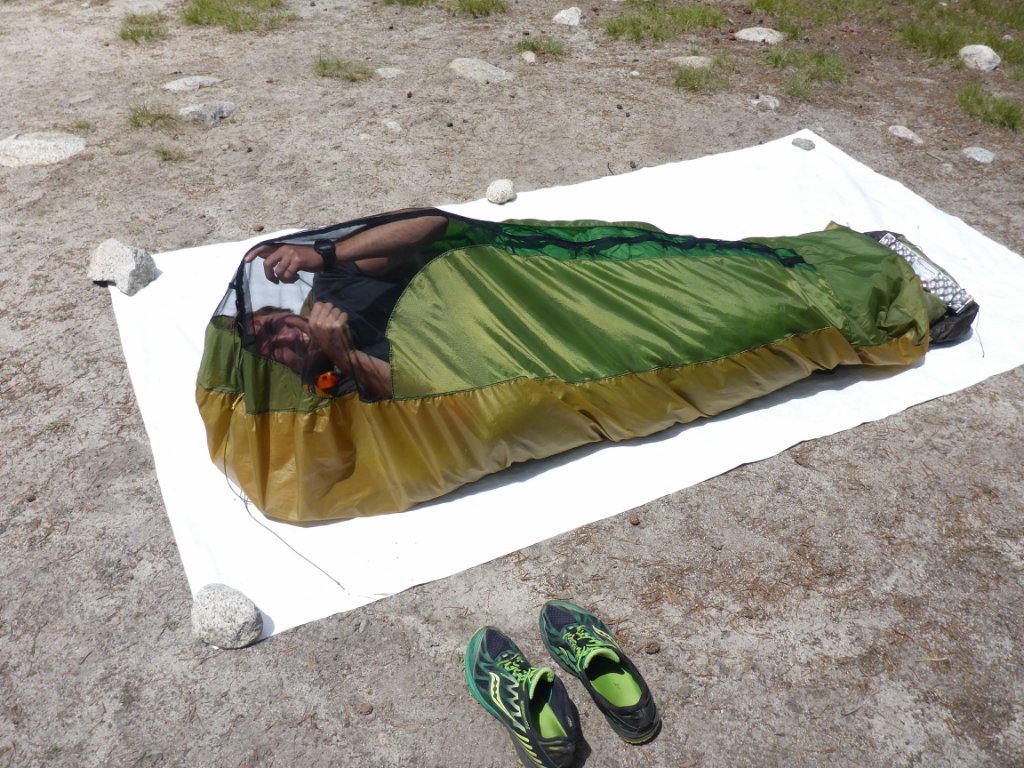
The bivy with sleeping pad, quilt and me inside. Backpack underneath my feet for insulation. The white groundsheet is Tyvek, I was about to cut a big chunk off of it here to reduce the weight.
Again, all fabrics came from ExtremTextil.de, I think they were about 75€. It was quite a rush to get the bivy put together before I left, but I managed to finish it two days before the start of my world trip. The final result weights 230 gram, but don’t compare that to the weight of a tent, because you’ll have to carry more weight to be able to handle the inevitable rain. Read on.
At first, it’s very weird sleeping in this. It feels restrictive and open at the same time. Restrictive because the bug netting is about 20 cm away from your face. Open because you can see right through the netting.
Much like the 3/4th size pad, I started taking quite a liking to it after a few nights. It’s actually really nice being able to see what’s going on outside. My mind (and maybe yours too) has this amazing ability to make the tiniest noise sound as if a huge bear is about to come crashing down on you. In a tent, that’s no fun, because you can’t see what’s actually happening. In a bivy, you just turn your head and shoot the squirrel causing all the ruckus an angry look.
It’s not all positive though. First of all, a bivy is like a single layer tent and thus you tend to get condensation on the inside of it. Since it’s lying directly on top of your quilt, that means the quilt gets wet. The bug netting did an amazing job at stopping condensation, but the lower 40 cm of the bivy doesn’t have netting and did have some condensation most mornings on the trail. It’s a problem inherent to bivies (and tents), simply due to physics, so there’s not too much you can do about it.
The drawback of having so much mesh on top is that the bivy isn’t waterproof at all. Well, the underside is (or should be, I didn’t actually test and wasn’t eager to do so on the trail), but the top isn’t. So you still need something above you in case it rains.
Most commercial bivies are made out of some GoreTex-like material, so they should be waterproof. Don’t think you won’t get condensation in them though, same problem.
Bivies offer less privacy compared to a tent. You can’t retreat into your bivy like you can in a tent. I didn’t really find that much of a problem, but some people might.
I quite liked the bivy, especially on cloudless nights where I could set it up without a tarp above. It’s really nice being able to sleep under the stars, but without having to worry about a legion of mosquitos using you as a blood donor.
I’m not convinced buying a commercial one is worth it though. From the little research I’ve done on them, they weight about as much as a lightweight (tarp)tent, which seems a much better option in that case. They also cost about the same.
If you are interested in really lightweight tents, there’s quite a few brands that make them. Henry Shire’s Tarptents are amongst the lightest ones, seem to get unequivocal praise and are much cheaper than big brand commercial offerings (they start at 205$), so I’d check out his models.
Etowah 8×10 ft SilNylon tarp
As I said before, the top of my bivy is basically completely open to rain, so I needed something to ward of that rain. I needed a tarp.
Actually, I wasn’t planning on buying this 75€ tarp, because I had brought one with me that I had made myself. However, that tarp was made for hammock camping and I had never actually tested whether it would work without a hammock. When I eventually did get around to testing it (about 1 week before arriving in the US), it became instantly clear that the hammock tarp wasn’t going to work at all.
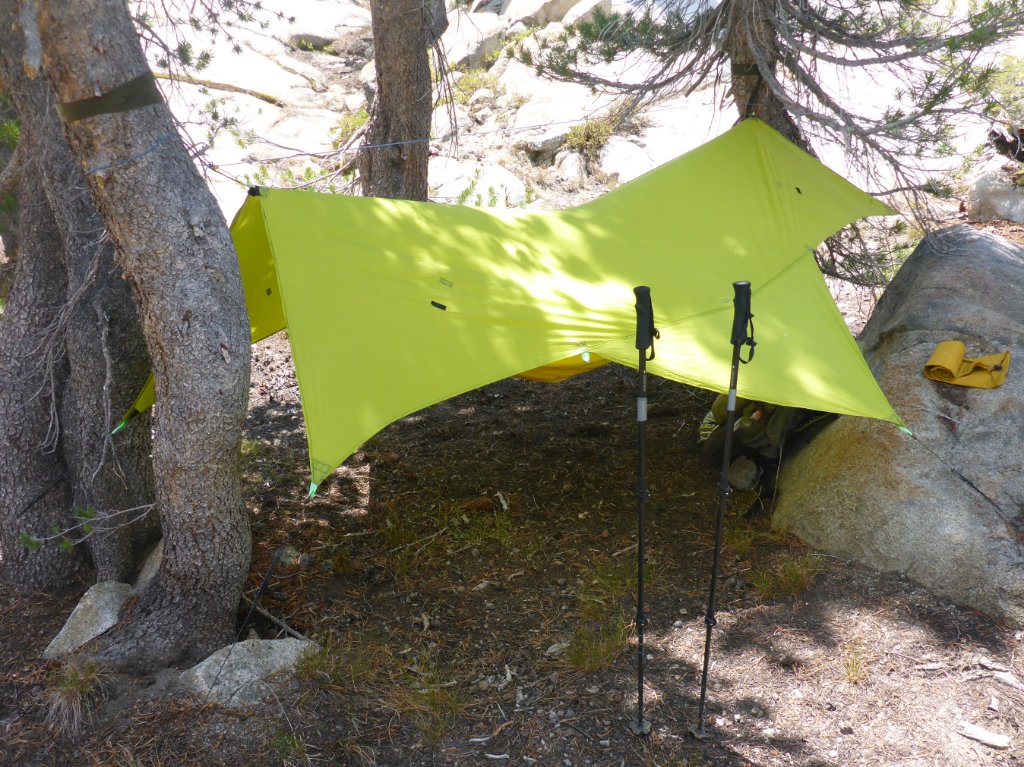
Enter the Etowah tarp. It’s basically the simplest type of tarp you can get, just a rectangle of silnylon with tie out points, 5 on each long side, one on the center of each short side and one in the center of the tarp. I got the 8×10 ft version because it was on sale, and because it is rather large, and so I wouldn’t have to worry about getting it set up just right. A wild guess for the weight is about 470 gram, which includes 12 guy lines that I added (Lawson GloWire, which is super reflective in the dark).
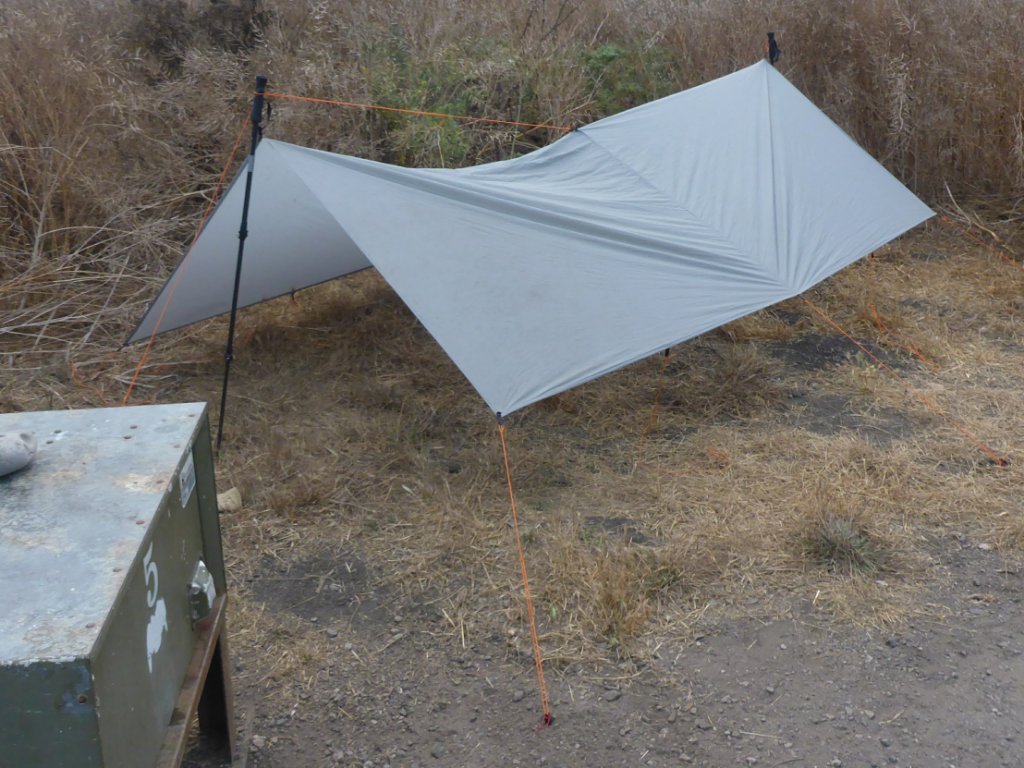
The Etowah tarp set up as a simple A-frame. The trekking poles are 1.3 m high here, and the tarp is about 3.3 m long.
The idea is that having such a general shape allows you to set up the tarp in a gazillion configurations. Now I’m sure there’s tarp wizards out there who can do that, but not me. I tried a couple of different setups the first weeks of June while I was in Yosemite, but in most of them the tarp touched the bivy. That led to massive amounts of condensation, way more than just the bivy, because the bivy’s top fabric is breathable, whereas the tarp is not.
In the end, I mostly resorted to variations of a simple A-frame setup. That’s where you lift up the center of the short sides (usually with trekking poles) and create an A shape with the tarp. Eventually I did kind of get it and wasn’t hitting the sides of the tarp anymore at night. In fact, when I got it right, the tarp was a veritable palace.
Tarps do not offer the same kind of privacy as tents, because in almost all configurations at least one side is going to be open. Just as with the bivy, I started to appreciate that after a few nights.
What I didn’t like at all though was how long it took me to set up the tarp. The big advantage of flexibility is also the biggest drawback, at least for me. I’m sure that with practice it becomes much less of a problem. Still, I never looked forward to the 20+ minutes it took me to get an acceptable pitch. That’s why I never set it up if the sky was completely clear at night.
When I did set it up and it rained, it performed admirably though. Not a single drop of rain ever made it through and I had one night where it was raining pretty hard for hours on end, so that’s saying something. So great job, Etowah!
If you want to compare the weight of a tent with my setup, then you need to take the weight of both the bivy and tarp in account. Together they weight about 700 gram, which is very comparable to the lightest tents out there.
In the end it’s a matter of personal preference. I think I would rather take a super lightweight tent with me for the convenience of easy setup and more or less guaranteed waterproofness. On the other hand, that would mean I would be much more closed off from the outside world. Ah, difficult :).
As a sidenote, I should mention that there are also shaped tarps. These can only be set up in one way, think of them as the outer layer of a tent (but without the metal guides and what have you). Might be the best of both worlds.
DIY Tyvek groundsheet
DIY is kind of an overstatement here, I cut a rectangle out of a bunch of Tyvek. Tyvek is a material used in buildings to act as a vapor barrier and is quite strong and reasonably waterproof. It’s also very cheap.
I forgot to weight my sheet, but it should be close to 190 grams. That’s actually a lot if you think about it. The only reason I took it with me was to protect the underside of the bivy from abbrasion and puncturing. But the bivy itself weights only 230 gram…
I’m not taking this into account when comparing the weight of a tent versus the bivy + tarp setup, because many people use a ground sheet for a tent as well and the weight would be similar.
Not much to say about this really. It did it’s job. One thing though is that it’s flat, and so if water is pooling all around it, it’s not going to stop it from running underneath your bivy. That might not be a problem if the underside of the bivy is really waterproof. I did not want to find out. Maybe next time :).
It would of course be simpler to just leave this at home and trust the bivy underside to hold up, or to use a sturdier and heavier fabric for the underside. A good idea for the next bivy?
MSR Mini Groundhog tent stakes
Tip: don’t spend your money on cheap Chinese tent stakes, they will bend the moment you try pushing them into hard soil.
Instead, just spend a couple euros extra and get these instead. The Mini Groundhogs are the smaller version of the Groundhogs, your typical 3-sided Y-shaped stake which works well in a lot of different soil types. They are a lot more durable than the crappy Chinese stakes I initialy had and that all bend within the first 4 nights camping in Yosmite.
I’m a fan! They are not super expensive (about 2.50€ each), seem to be really strong and don’t weight a lot (8 gram each). There’s lighter titanium stakes out there, but while those won’t help you shave much weight off, they will have you spend a lot more money. Personally, I’d stick with the Mini Groundhogs.
DIY hammock & tarp
Note: I did not bring this with me on the JMT. I did however take it with me on a 5 day trip into the Emigrant Wilderness.
I just want to mention hammock setups here, because sleeping in my hammock was oh so much more comfortable than sleeping on the ground.
The major reason I decided not to bring the hammock on the JMT is because I was afraid there weren’t going to be trees to hang from at all camp sites. Next time, I will bring the hammock. Apart from high up near some of the passes, there are plenty of trees that you would be able to hang from.
The only regularly used camping spots that I remember that didn’t seem to have trees are: up near Silver Pass (there might have been a few), up at Lake Marie (again, maybe a handful?), just south of Forester (you don’t want to camp there anyway) and up at Guitar Lake (camp 2 km before at Timerline Lake).
So yes, you can definitely hammock camp the whole JMT. I know I will if I ever hike it again.
Cooking setup
Fire Maple 1 l aluminum pot
Not much to be said about this. It’s a reasonably cheap, but well designed pot. There’s some kind of heat exchanger looking part on the bottom, although I’m not convinced it does a lot. The handles lock together nicely and the silicone sleeving means they don’t get hot to the touch. The inside of the pot has marking each 250 ml. Being aluminum and given its volume, it is not exactly super light, about 222 gram.
That’s it really, it does its job. It can easily hold a gas cannister, a gas stove, an alcohol stove and a lighter, so you can store all of your cooking gear inside, which is nice.
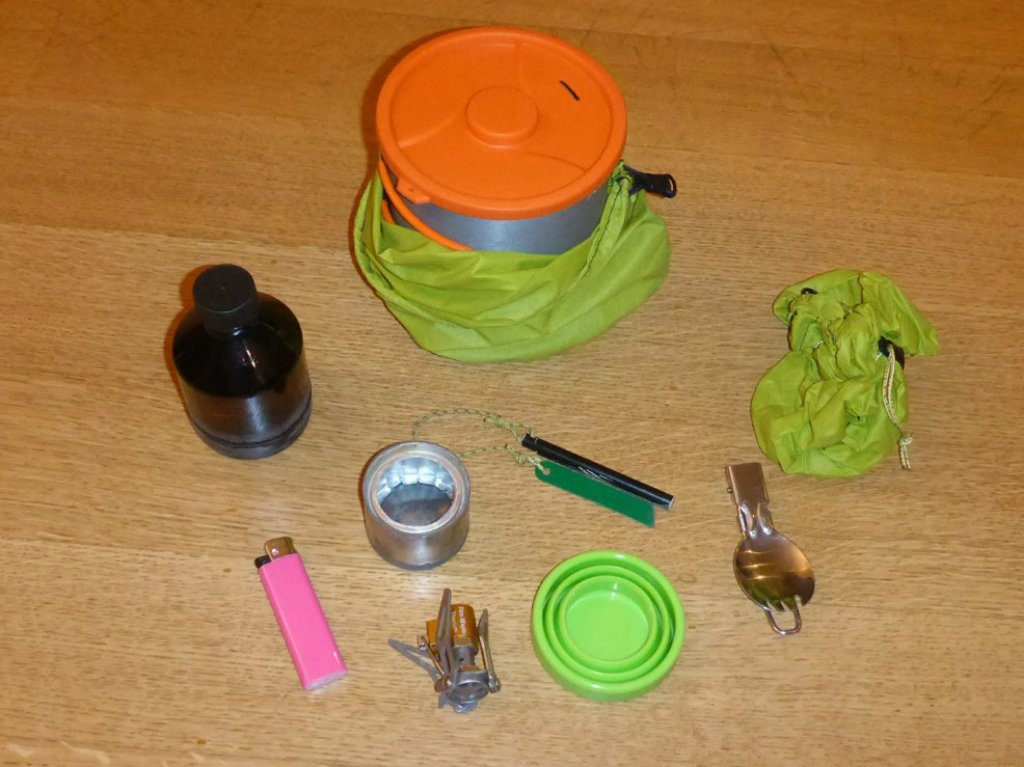
Most of the cooking gear, from left to right: alcohol container, lighter, alcohol stove, Fire Maple pot in DIY silnylon bag, Fire Maple FMS300-T gas stove, ferrocerium rod, plastic foldable cup (didn't bring), foldable spork (didn't bring), and DIY clothes washing bag (didn't bring).
If you are only going to be rehydrating meals, get something smaller, about 600 ml should suffice. Rehydrating is what I was doing, so I know what to bring next time. If you plan on cooking in the pot itself or rehydrating for more than one person at a time, then bring something with this volume or larger. I’m not quite sure if you can find small pots cheaply, because most very low volume ones tend to be titanium for ultra lightweight purposes.
DIY capilary hoop alcohol stove
Because using an alcohol stove tends to be the lighter alternative to using a gas stove, that’s what I chose to do on my hike. There’s tons of websites on the advantages and disadvantages of various cooking setups, so if you are curious about that sort of thing, Google away or shoot me a mail.
The type of stove I made was based on the capilary hoop stove by Tetkoba, his tutorial for which can be found on YouTube. Wanting to make my stove sturdier than it would be using two cans of Red Bull, I decided to use a shaving cream can for the outside. That turned out to be a mistake, because that can was some type of steel, whereas the inside was aluminum. Both expanded at different rates when heated and time and again gaps would appear at the top of the stove, ripping apart the JB Weld holding everything together.
Those gaps led to big vertical flames sometimes shooting out of the stove. Less than ideal. The stove still worked though. However, I didn’t have a wind screen which turned out to be a pretty critical part of the setup. Without it, I was using a ton more fuel than I had anticipated and so I had to give up on the stove. When I arrived at Red’s, I tossed it in the hiker’s bin.
I’m definitely still a big fan of alcohol stoves, so as soon as I get back home, I’m fabricating a better one. And that crucial wind screen of course!
If you want to check out alcohol stoves, there are tons of websites dedicated to them. You won’t have any trouble finding all sorts of tutorials on how to make them. The advantage is that most are really easy to make, all you need are a couple of soda cans and maybe a drill bit and a knife, that’s it.
If you can’t be bothered making your own, there’s a lot of different types of stoves for sale online. If you want a really sturdy one, look either to commercial (heavy!) ones or search for those with rolled edges.
Fire Maple FMS300-T gas stove
At only 45 gram this stove is a lightweight. When I bought it, it was the lightest commercially available gas stove, but in the meantime that honor goes to the BRS-3000T gas stove at 25 gram. Still, this one is really nice. It folds down super small which makes it easy to fit it inside your cookpot together with a gas cannister. The pot stand legs lock into the heat exchanger part of my pot which makes the whole cooking setup pretty stable, despite it being rather small.
I only took this with me as a backup and figured carrying an extra 45 gram would be worth it. Turns out it was, after tossing my alcohol stove at Red’s Meadow, I boiled water using this little stove for the rest of the hike.
If you want to get a tiny little stove, at this point you are probably better off ordering the BRS-3000T, which seems to be getting quite good reviews and is almost twice as light as the FMS300-T. You can get one on eBay or Amazon.
BIC mini lighter
It’s a lighter, it creates a flame. The tiny one has more than enough fuel to light your stove for a long hike, so no need to bring a big one. Even if you run out of lighter fuel, you can still throw sparks with it.
Ferrocerium rod
As a backup to the lighter I carried a little fire starter rod as well. I figured this would be one of those items where having a backup would be rather nice. And I was glad to have brought it after everything inside my cook pot got wet one night and the lighter didn’t work anymore.
DIY pot cozy
If you want to keep your food warm longer, you’re going to need a pot cozy. This is probably a good idea anyway, but it’s especially so at high altitudes where food needs to rehydrate a lot longer and you would be left with a cold meal for dinner if it weren’t for the pot cozy.
Making one is extremly simple and cheap. Just get a bunch of duct tape, some reflectix (the kind of material people put behind their car window to keep the sun from heating up the car) and go to town. You can make a bottom and a top part and store your cook pot inside. I only made the bottom part and made it foldable, so I could store it inside the pot. Your choice, go crazy.
Sea to Summit AlphaLight long-handled spoon
This was one of my best late additions to my whole setup! When I arrived in the US, I had a foldable spork with me, but that turned out to be crap since it would fold inwards constantly. So I bought a non-foldable spork. Then I found out that the fork part is utterly useless when consuming camping food, and that the short handle is really annoying when eating out of a pot. Imagine the joy when I found this in the store :)!
The long handle is super convenient, it lets you eat out of your pot and out of freezer bags without getting your hands full of food. The only downside is that naturally it doesn’t fit in your cooking pot. Just stash it with your food, problem solved. Oh, and don’t bother getting a fancy titanium one. At 12 gram, the cheaper aluminum ones are actually almost 50% lighter than their more expensive brethren.
Join me in my crusade against sporks and buy a long-handled spoon now!
Sawyer Mini Squeeze water filter
If you’re out in the wilderness, you’re probably going to want to purify your water somehow. There’s some people that don’t, but I didn’t want to risk getting giardia. Out of the dozens of purification systems out there, I chose to go with this one for a couple of reasons.
First of all, it’s very small and light. The total weight, together with a small “dirty water” bladder is just a little over 80 gram. Second, it also rather cheap compared to the alternatives, I believe I paid about 30€. Third, it allows you to filter as much water as you want, no need to worry about running out of batteries (e.g. Steripen) or chemicals (e.g. AquaMira). Finally, it filters out particles, which two of the popular alternatives (Steripen UV lights and AquaMira chemicals) don’t do.
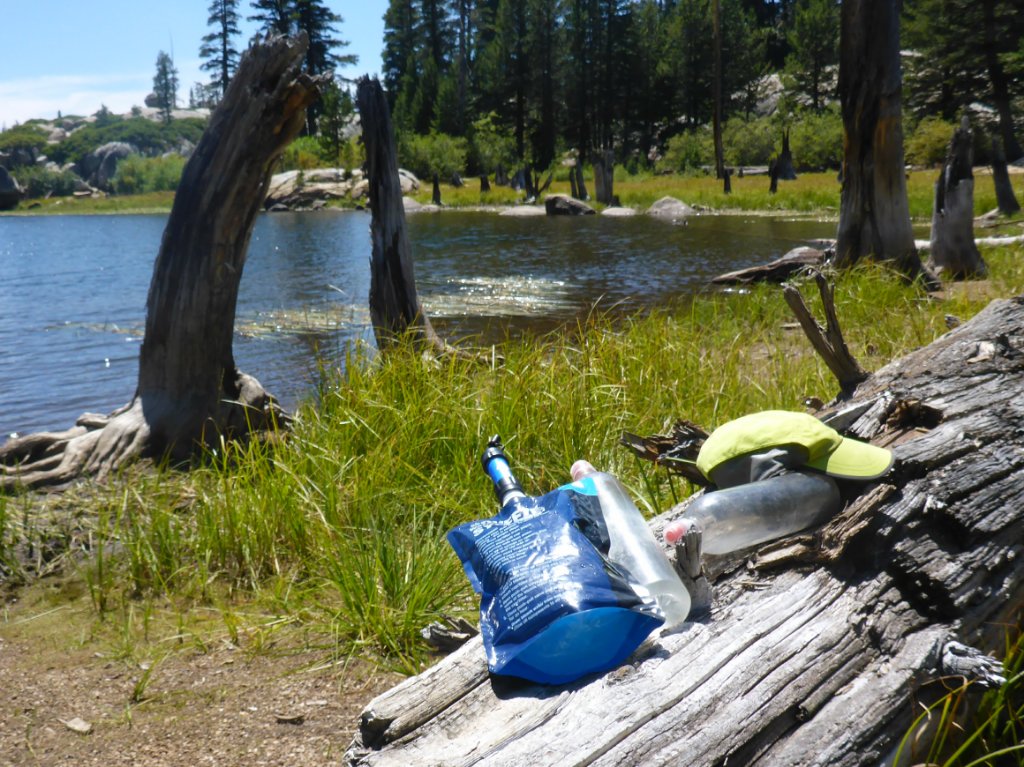
The Sawyer Mini Squeeze screwed onto the dirty water bladder, ready for some filtering at Bear Lake in Emigrant Wilderness.
My main gripe with the Sawyer Mini Squeeze was how slow it was. Initially I was using a 0.7 liter bladder for the dirty water, but it was impossible to fill it completely so I had to refill it 5-6 times to be able to fill my two 1 liter bottles. When I found a larger 1 liter bladder in one of the hiker boxes at Muir Trail Ranch, I took that with me instead and it slightly improved the speed. Still, I needed to push really hard on the bladder to get the clean water to come out at an acceptable speed.
When I headed into the Emigrant Wilderness, I took a 2 liter dirty water bladder with me and that was definitely a mistake. I had hoped that the bigger bladder would help me to drastically cut down filtering times. What I hadn’t taken into account is that pressure equals force divided by area. Meaning that with this much bigger bladder, it was basically impossible to squeeze hard enough. When the bladder was full and I was pushing on it as hard as I could the water flowing out of the filter was little more than a trickle. Lesson learned: go for a small bladder with this filter.
My ideal setup would be the AquaMira droplets and some easy way to quickly filter particles out of the water, that way it would take about 1 minute to get 2 liters of clean water, instead of the 15 minutes I have to spend right now. A DIY plan for later :). For now, the Mini Squeeze works pretty well. If only it would filter a little faster, it would be perfect.
SmartWater bottles
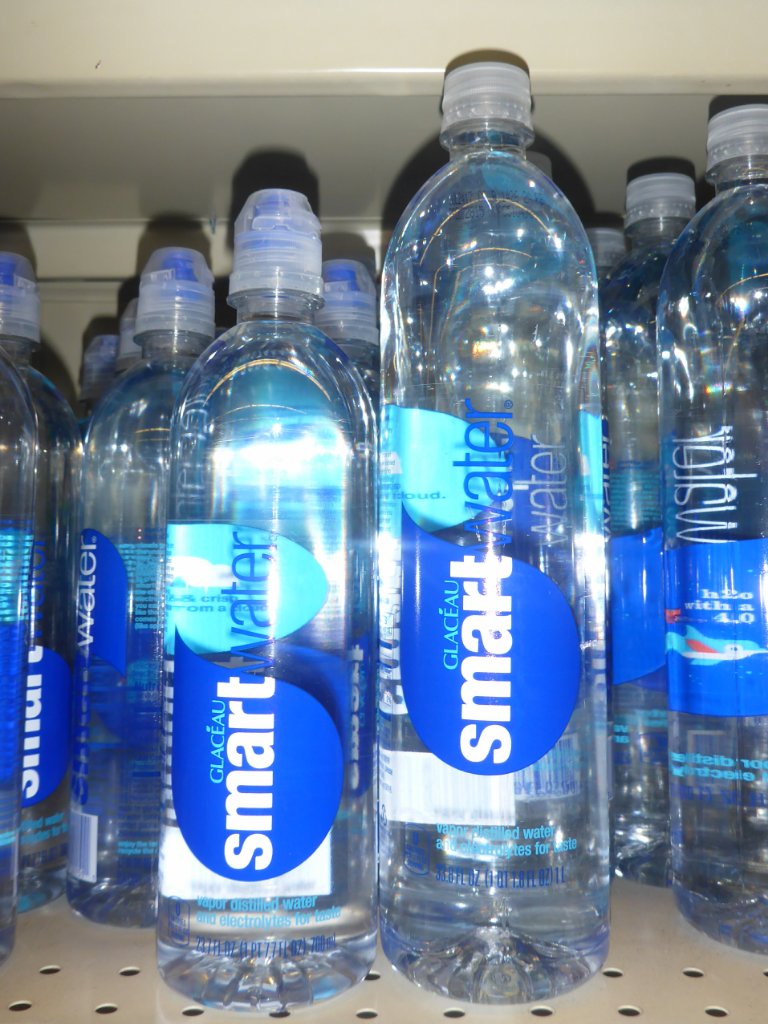
Most people who go lightweight don’t take one of the “traditional” water bladders because are relatively heavy. Instead, you can just take regular water bottles. They are super light, cost virtually nothing and are made specifically for the job. And in case one should break (how many times have you seen a water bottle break?), just get a replacement at your next resupply.
I suggest taking two 1 liter SmartWater bottles. These are ridiculously overpriced, but well, it’s a bottle of water, so it’s not going to break the bank. The big advantage of these are that they are really slim and high, so they fit very well in the side pockets of a backpack. A huge amount of people I encountered on the trail were carrying these, which has to say something.
Make the company that produces SmartWater even happier and buy 2 smaller bottles as well. Put the flip tops of the smaller bottles on the bigger 1 liter ones. Those tops make it really easy to drink on the go, you’ll only need one hand to grab a bottle, open the flip top, drink, and put the bottle back in your side pocket.
There, I didn’t know I could write that much about a plastic water bottle.
Ziplock freezer bag cooking
Beforehand, I had put all my dinners in a Ziplock freezer bag (the ones with the blue top). Then, on the trail, all I needed to do was boil the right amount of water, pour it in the bag, put the bag inside the now empty pot with the pot cozy around it, and wait. About 10-20 minutes later, I’d have a hot meal.
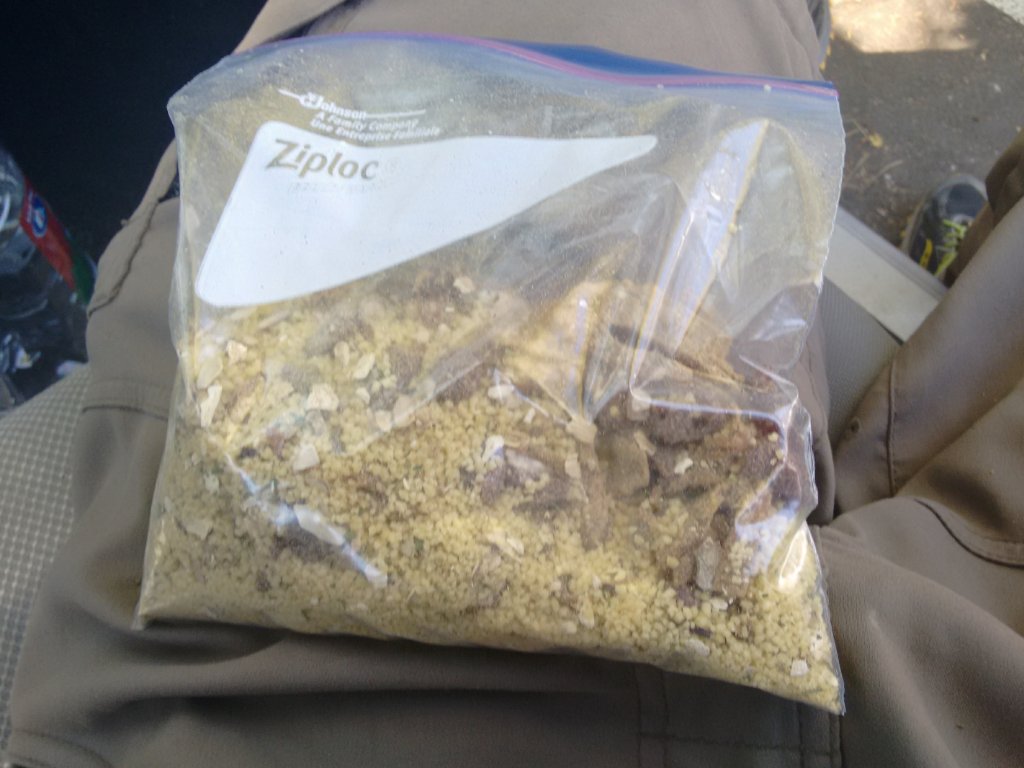
A 1 liter Ziplock freezer bag with couscous, cranberries and turkey jerky. Just add 250 ml boiling water, wait a couple of minutes and done. Super easy!
I really loved cooking like this. The pot stays clean, so you don’t need to worry about bears going after it. And after dinner you just have to put the freezer bag with your other trash. I am aware some people really dislike having any (heated) plastic near their food though.
Still, it’s also a very convenient way of taking food with you. Especially for those freeze dried meals that come in huge bulky packages. Just put them in one of these bags instead. And crush them to save some more space. They’ll taste the same ;). You probably want to go for the quart (1 liter) size, those should work, unless you plan to eat ungodly amounts of food all at once.
The freezer bags are waterproof, but the Ziplock snack & sandwich bags aren’t completely. I discovered that first hand after quite a bit of water had somehow made its way into my bear cannister. I guess I didn’t close it properly, and then it rained hard all night long. That was a fun morning :).
I’m not sure whether non-Ziplock branded bags can withstand boiling water without melting. If you’ve tried some other brand and it worked, let me know.
Soon on a computer display near you: the next and probably final post in this gear review series.
